Documentation
Table of Contents
Quickstart Guide
We start the documentation with the Quick Start Guide to have you up and running as soon as possible, and it should help you once you forget something.
- Create a project
- Connect Simply Static
- Run a static export
Create a project
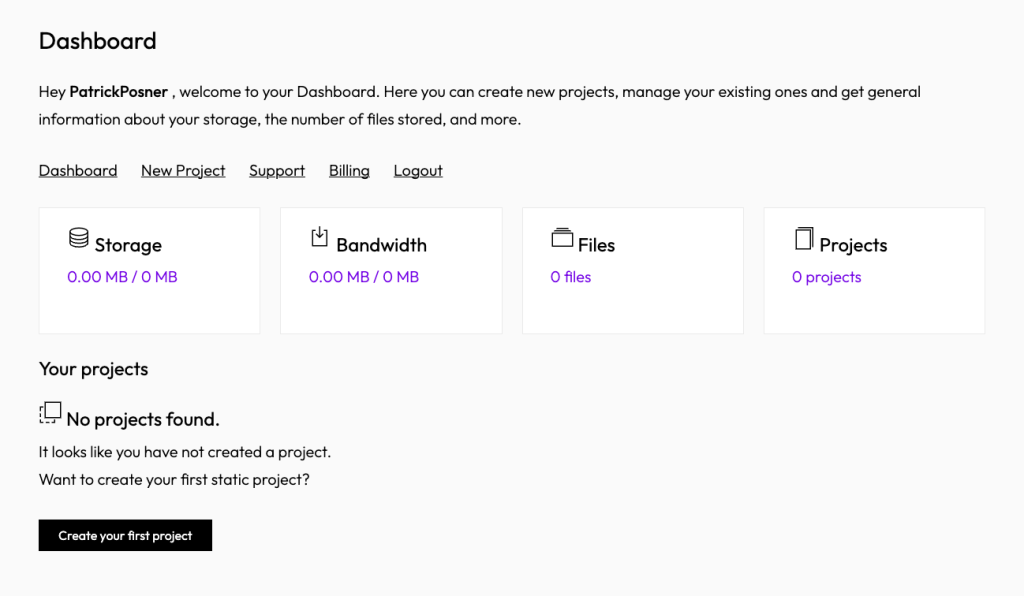
Once you subscribe to a plan, an account is automatically created. Go to the login page, enter your e-mail, and you will receive a login link. After the login, you will land on your dashboard. Click on Create your first project to get started.
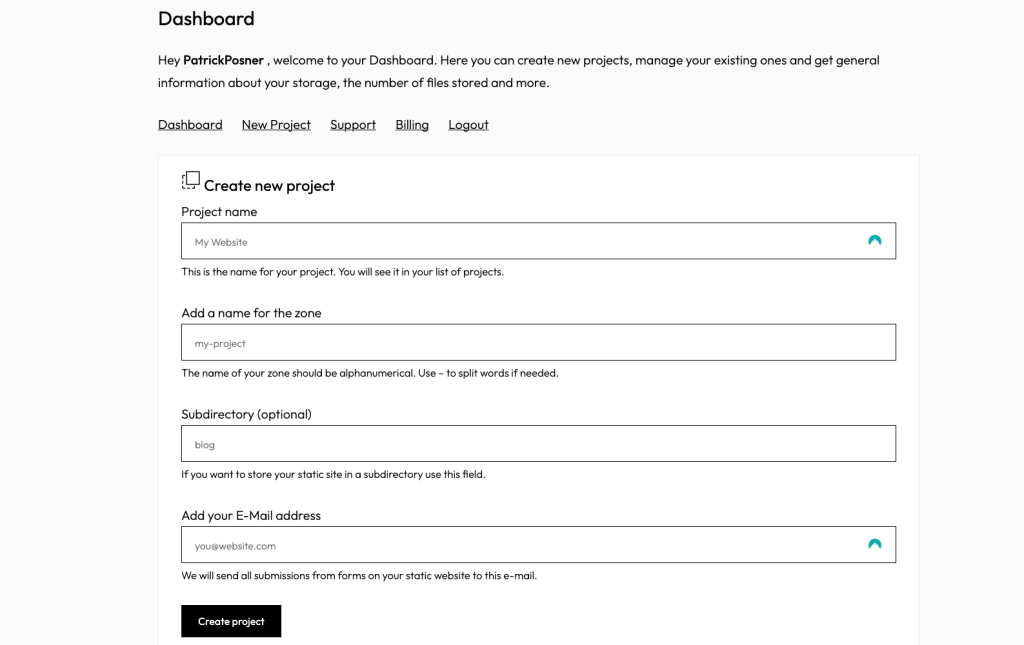
You will be redirected to a form where you must fill out a few fields to create your new project.
You need to give it a name, a zone (a lowercase name that will generate the temporary domain name), and the e-mail address where you want to receive form submissions. You can also add a subdirectory if you like.
Connect with Simply Static
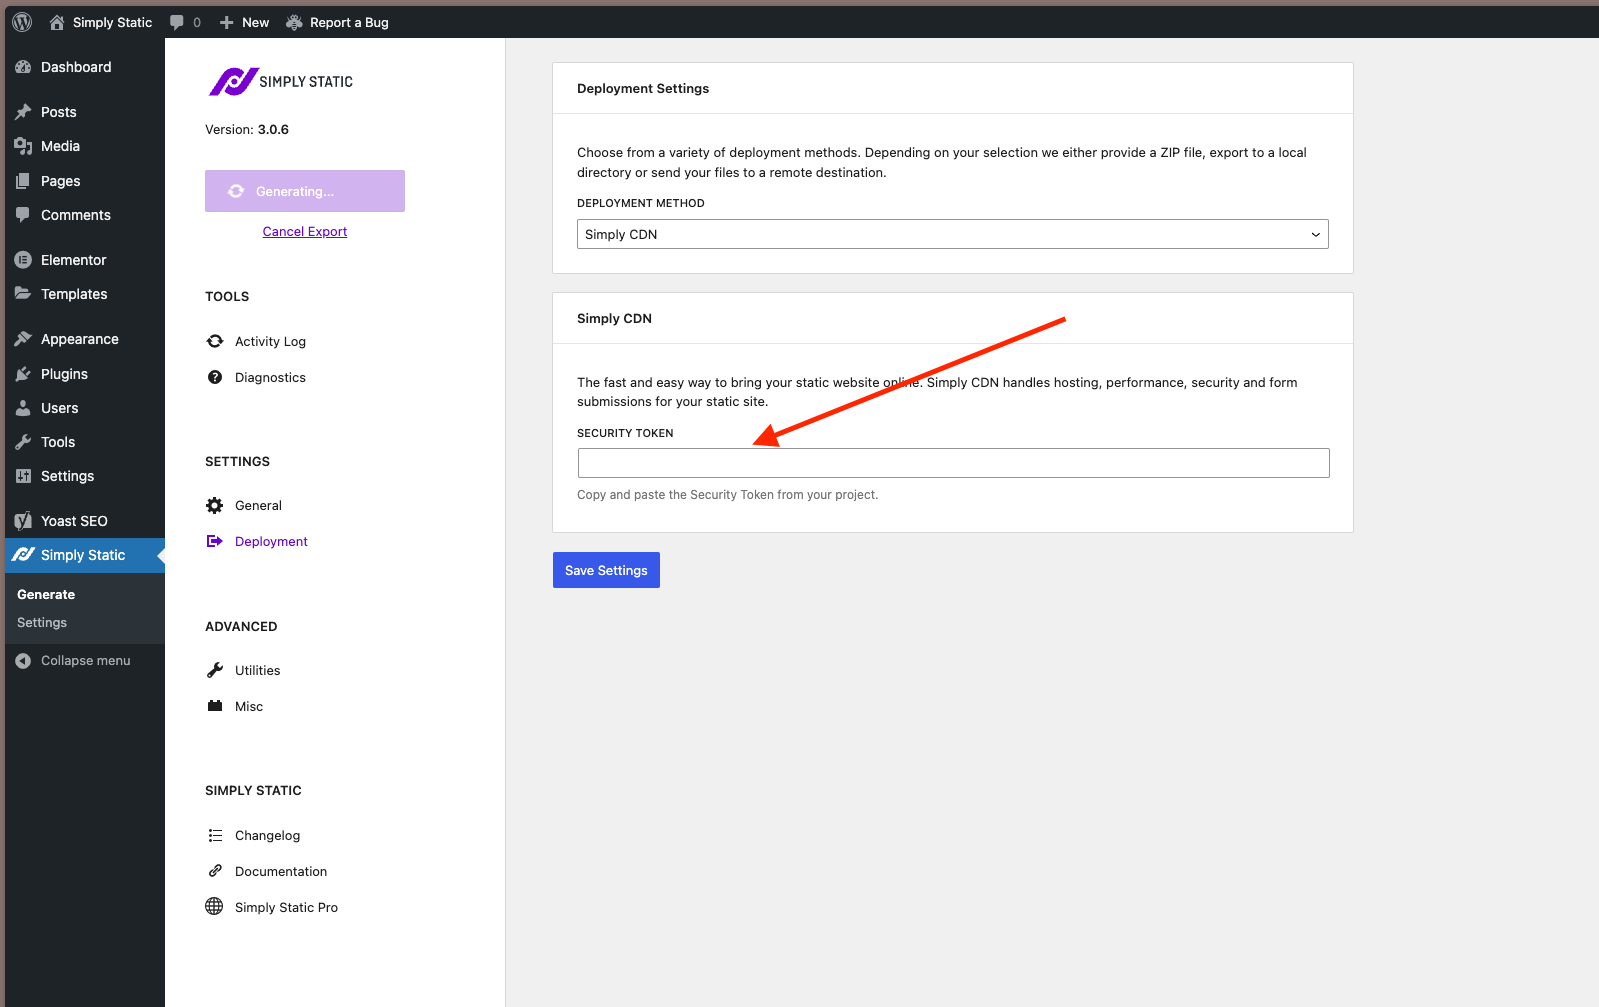
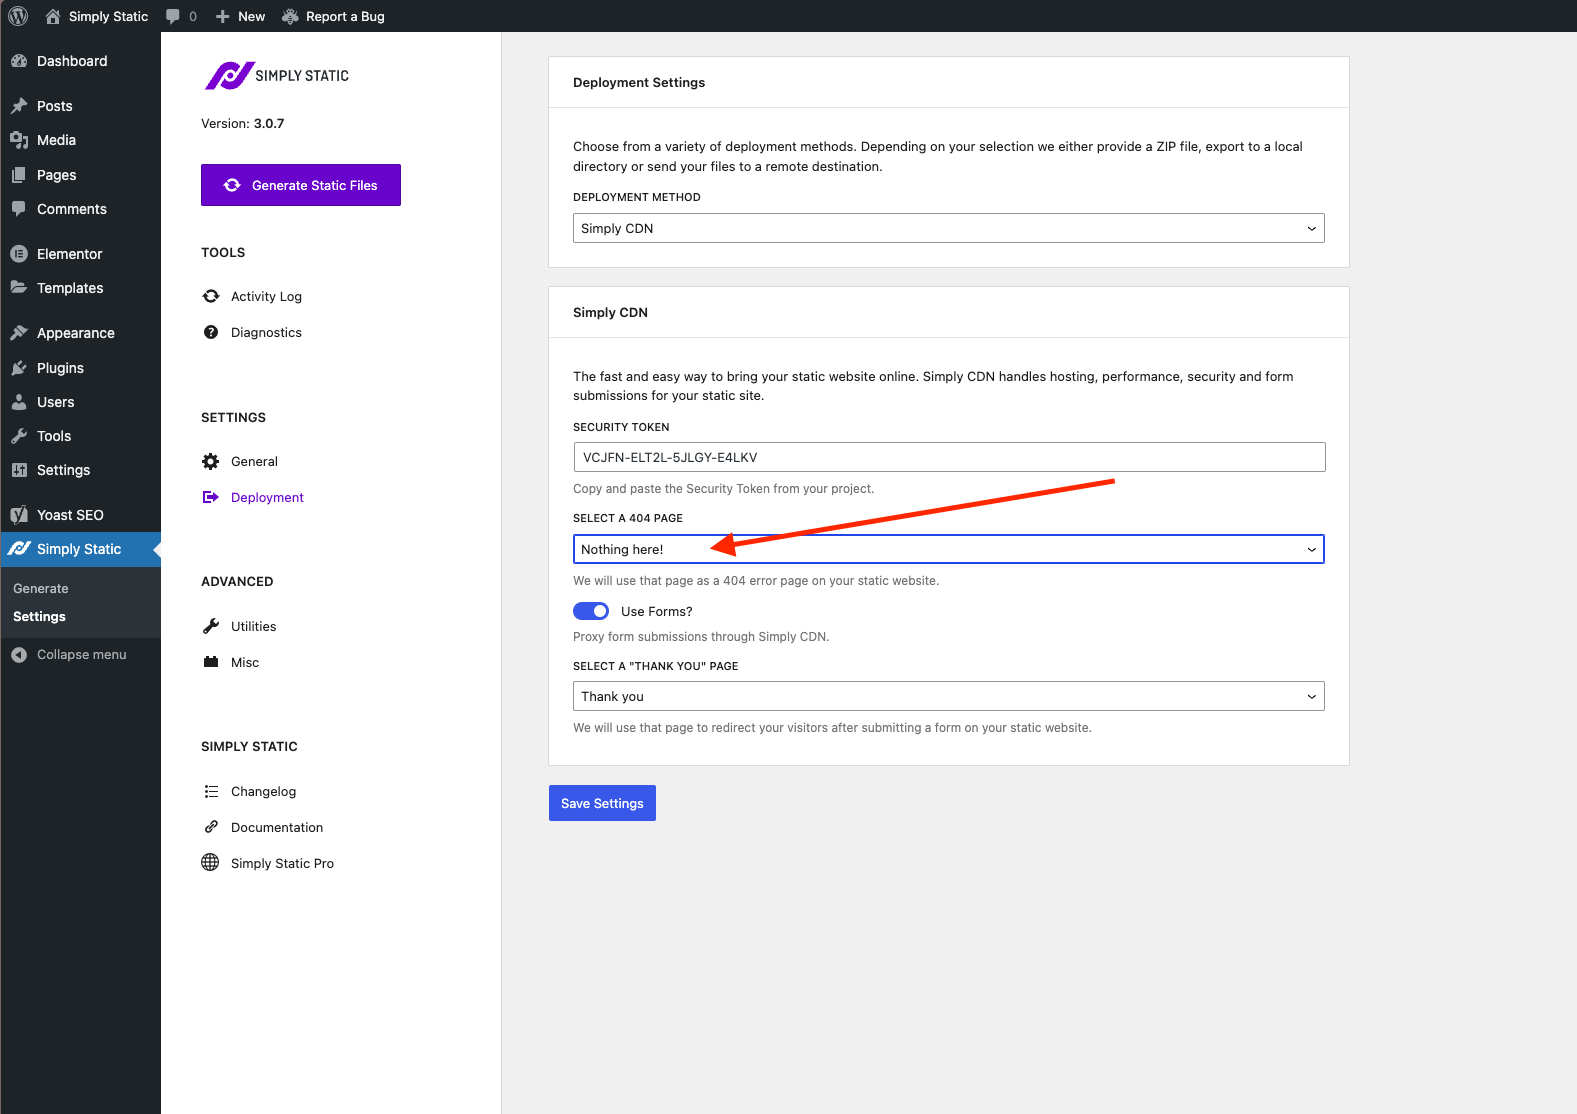
To connect your WordPress website and Simply CDN, go to Simply Static -> Settings -> Deyploment and select Simply CDN as the deployment method.
Now copy and paste the Security Token from your project details and click Save Settings.
Run a static export
Go to Simply Static -> Generate and click on Generate Static Files.
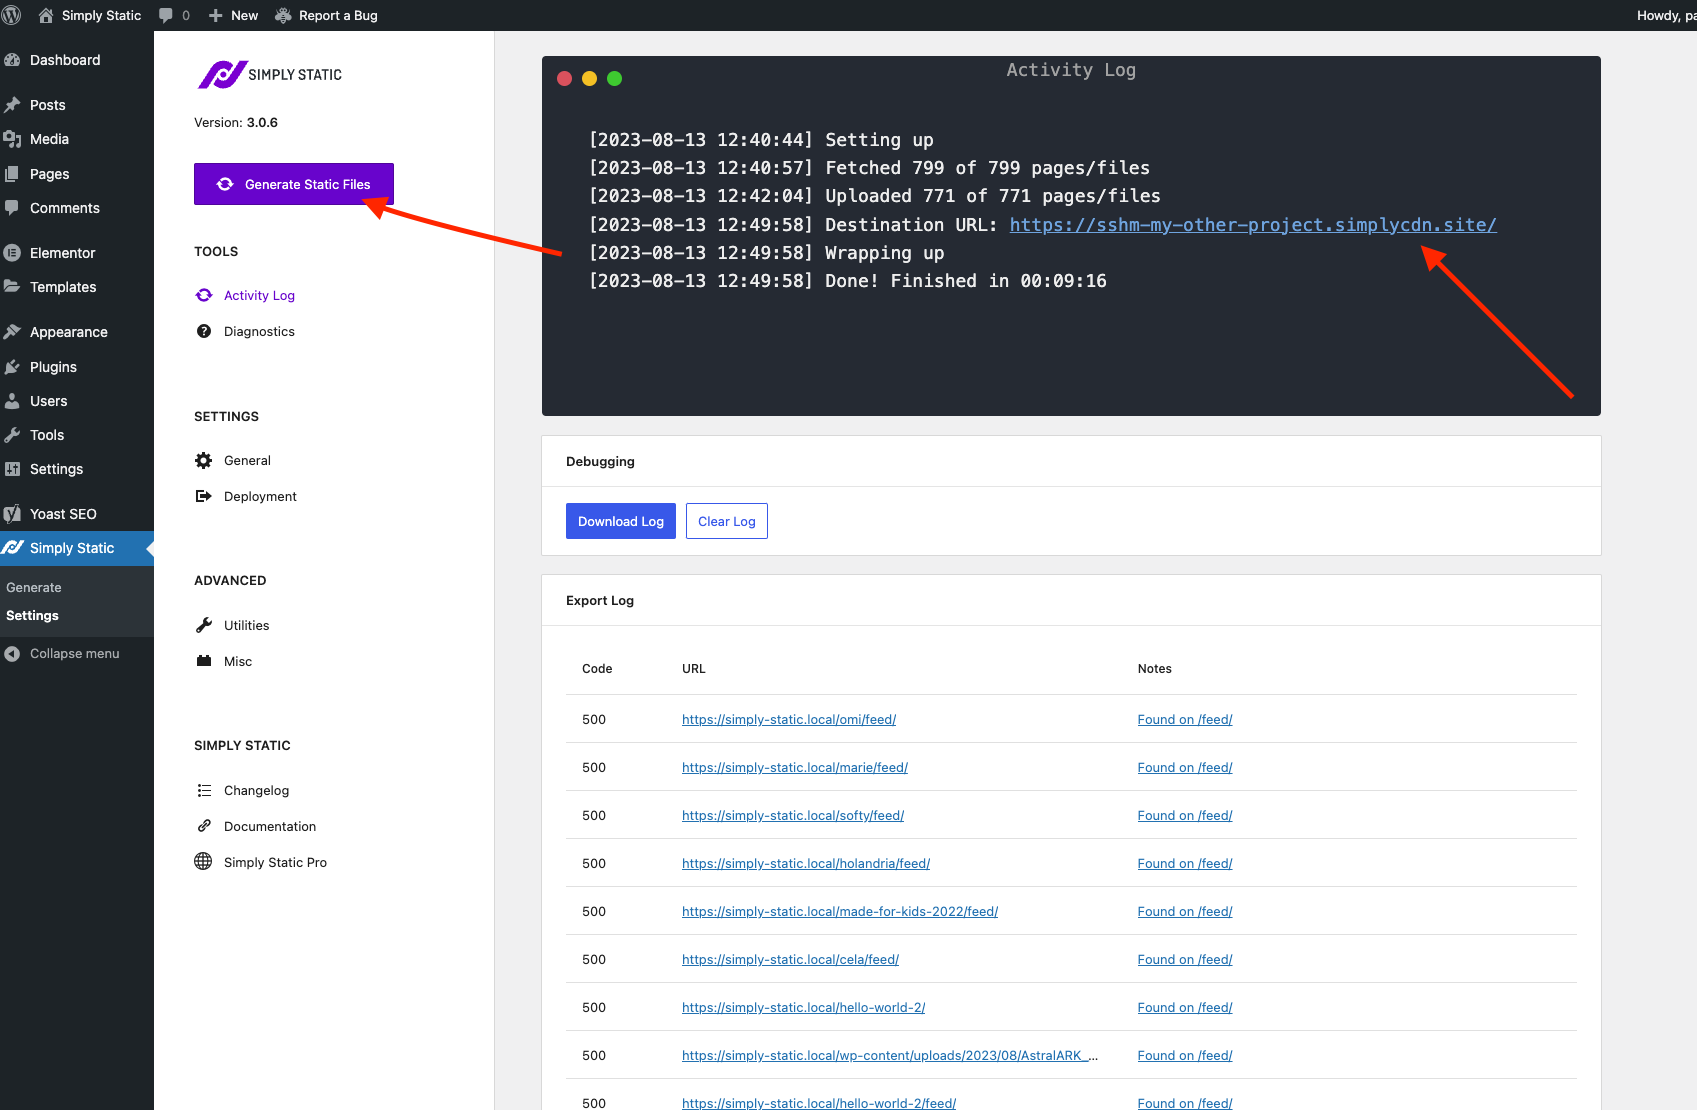
Once the process is finished, you can view the result by clicking on the URL within the log to view your static website.
Domain Mapping
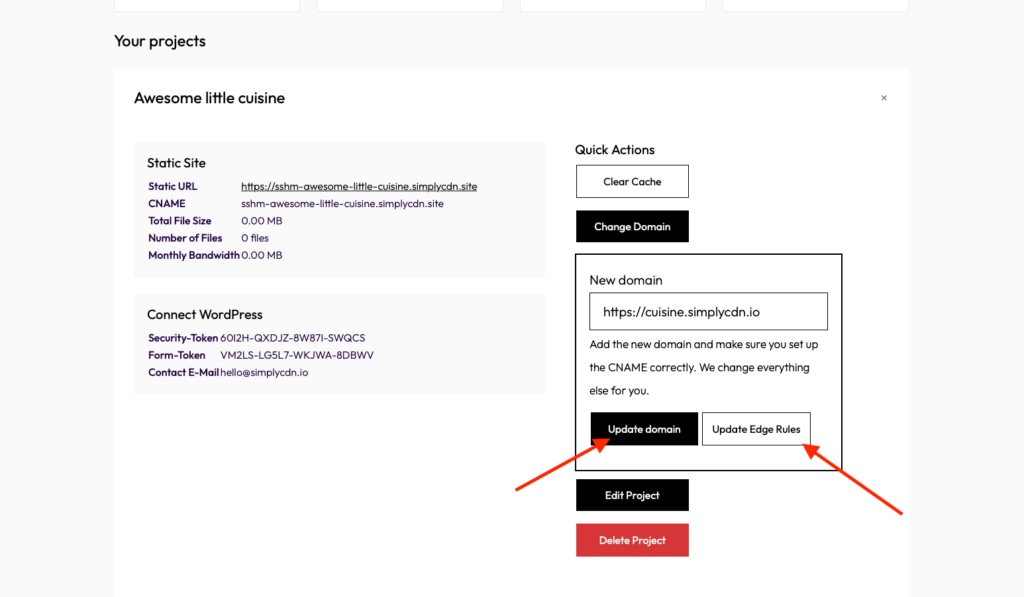
Once you have finished all the steps from the Quick Start guide, you will have a fully functional static site on project-name.simplycdn.site. Now it’s time to map that static site with your own domain. Go to your Simply CDN Dashboard and select the project.
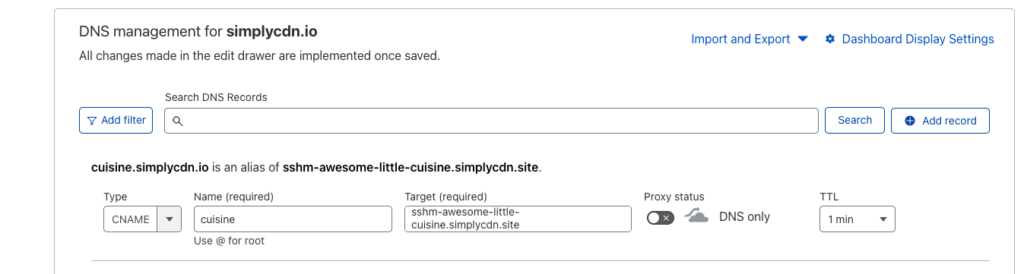
You will find a CNAME value that you can copy:

I’m using Cloudflare to manage my domains, but the process is similar to the DNS system of your domain provider. Add A CNAME record for your domain, and paste the value you have copied from the SimplyCDN dashboard.
Once done, head back to your project in Simply CDN, click on Change Domain, and add the new domain.
Click on Update Domain to confirm the change. It’s also recommended to update the Edge Rules to ensure all redirects are updated.
Once the DNS changes are live, your new website will be available under that domain.
Additional Features
Simply CDN ships with a bunch of different features to make your life even easier. While not necessary for every project, they will make your life easier.
404 Page
Go to Simply Static -> Settings -> Simply CDN ->Path to your 404 page. Here you can add a relative path of your domain as a custom 404 error page.
Use Forms Integration
Simply CDN automatically sends all form submissions to your configured e-mail address while setting up your project.
Ensure to include the Form Token displayed on your dashboard as a hidden field of your contact form to establish the connection.